
Making a Combat Revolver

Some out there would argue that any firearm in anything but its original form is blasphemy. I’m not that person. The whole reason I learned to gunsmith in the first place was so that I could modify my guns to meet my specifications. Now, don’t get me wrong, if you start to hacksaw on some classic collectable, I’m going to yell at you too, but luckily, the gun world is chock full of beaters, truck guns, rust buckets, and guns that just weren’t that spectacular to begin with. Let’s see if we can take one of these dogs and make it something special.
The candidate.
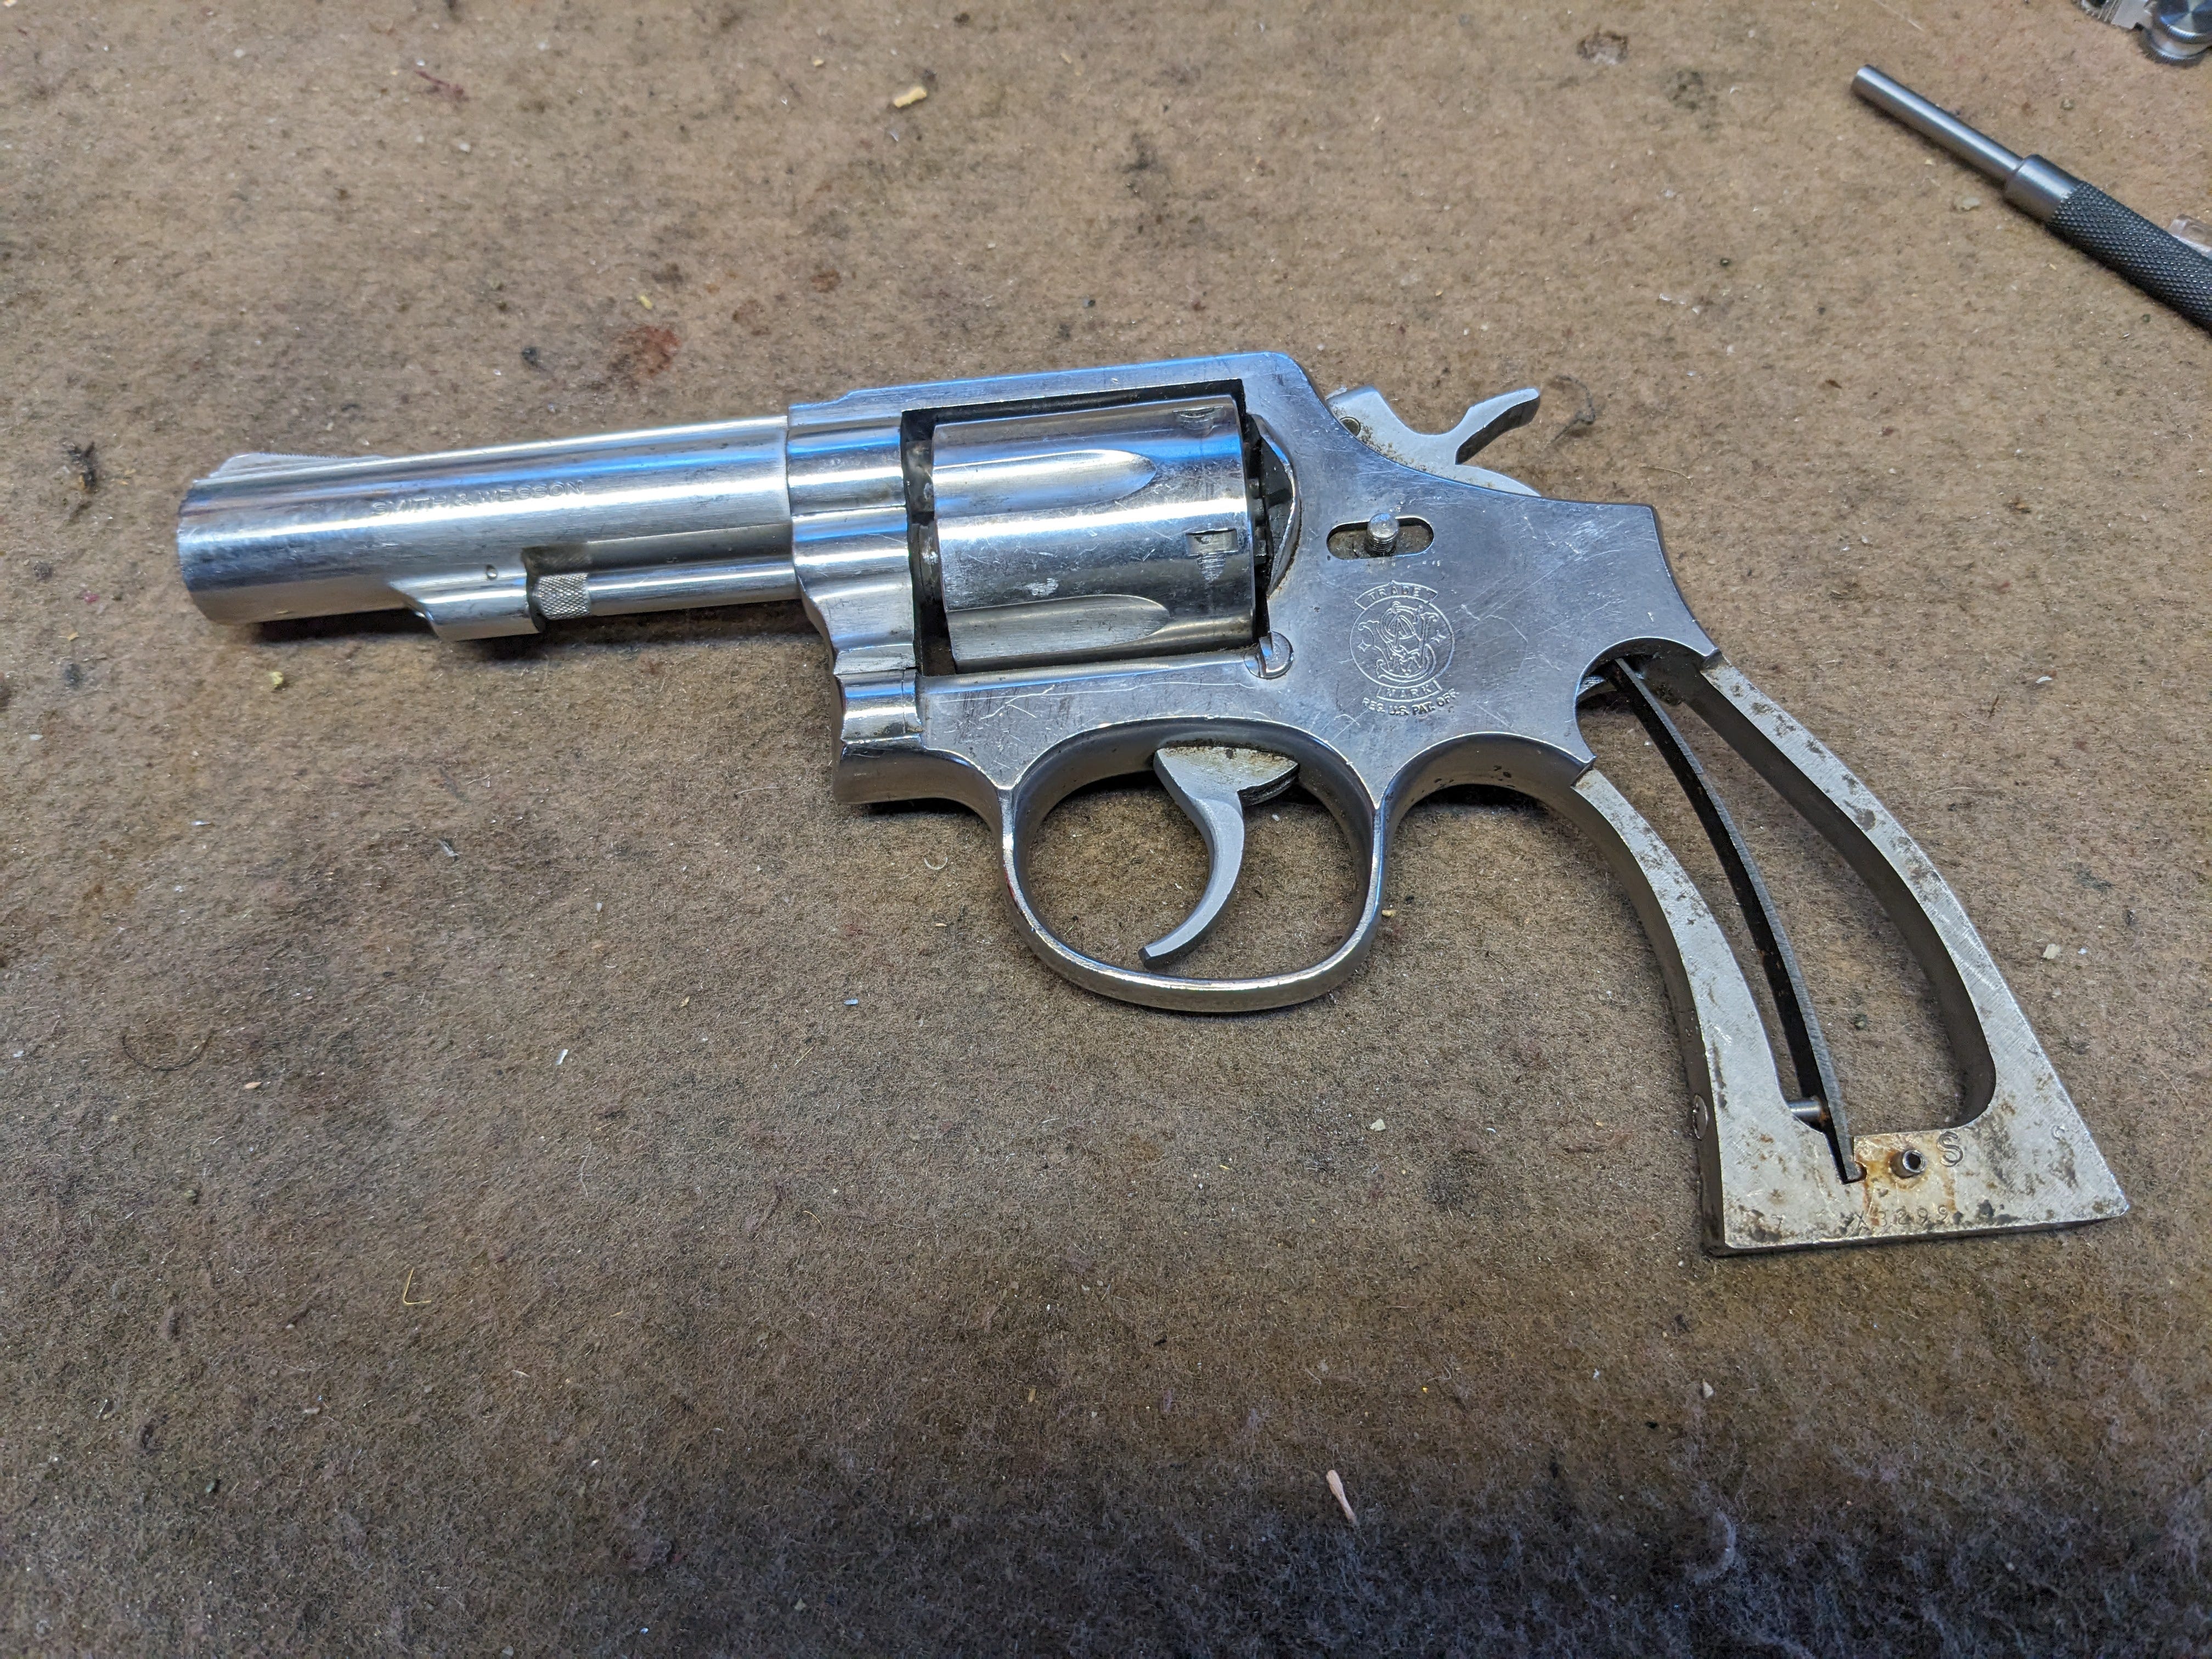
One of my daily Gunbroker searches revealed a perfect candidate for modification. It was a Smith & Wesson model 64 chambered in .38 Special. The model 64 was a popular gun with police departments back before the .357 Magnum hit the scene. It is a stainless steel version of the model 10, probably the most popular police issue revolver ever and used worldwide. The stainless model 64 is not nearly as collectable as the model 65, which is the .357 Magnum version of the same gun, but if you are a handloader, you know that you are not at much of a disadvantage in that regard. This particular gun was a bit of a basket case and was missing a few parts, all things I knew I had floating around in my parts bins. So I threw a modest bid of $200 bucks on it, and wouldn’t you know it, three days later I had a new project gun headed my way. Now, the question was what to do with the thing.
Inspiration.
I was wondering what to do with this gun when I heard about the passing of Tiger McKee. In case you are not familiar, Tiger was a shooting instructor and a great gun writer, and later in his life, he became quite an accomplished gunsmith specializing in converting older revolvers into combat guns with an eye toward the modern use of revolvers in self-defense. It seemed only fitting to convert this model 64 into something Tiger would have been proud of. Tiger made some lovely revolvers, but they were very practical. I wanted to create something valuable for combat purposes that didn’t lack in the looks department.
Tiger wasn’t the first person to look at a revolver and say, I can improve this. Many gunsmiths and shooters had been doing it for generations. One of the more famous people was John “Fitz” Fitzgerald, who became famous for taking Colt double action revolvers and making them into a “Fitz” special. He would chop the barrel to 2 inches or less, bob the hammer, and, most recognizably, remove the front half of the trigger guard. Tiger and I would later use many of these implementations when designing our guns. The Fitz modifications inspired Colt to design and produce the Detective Special, the first snubnose revolver. Other manufacturers quickly followed it, and now the design continues to endure in the revolver world. I will discuss the advantages and disadvantages of the Fitz design as we go through the modifications I made to my revolver.
Get out the hacksaw!
Maybe I’m weird…I’m definitely weird, but nothing beats the excitement of having an old gun on the table with a world of possibilities in front of you. When I build a gun for myself, I like to let it grow organically. I like to let the gun and parts I have fished out of the parts bin tell me what the weapon wants to be, much like a woodworker who includes unusual grain and knots into the pieces they build.
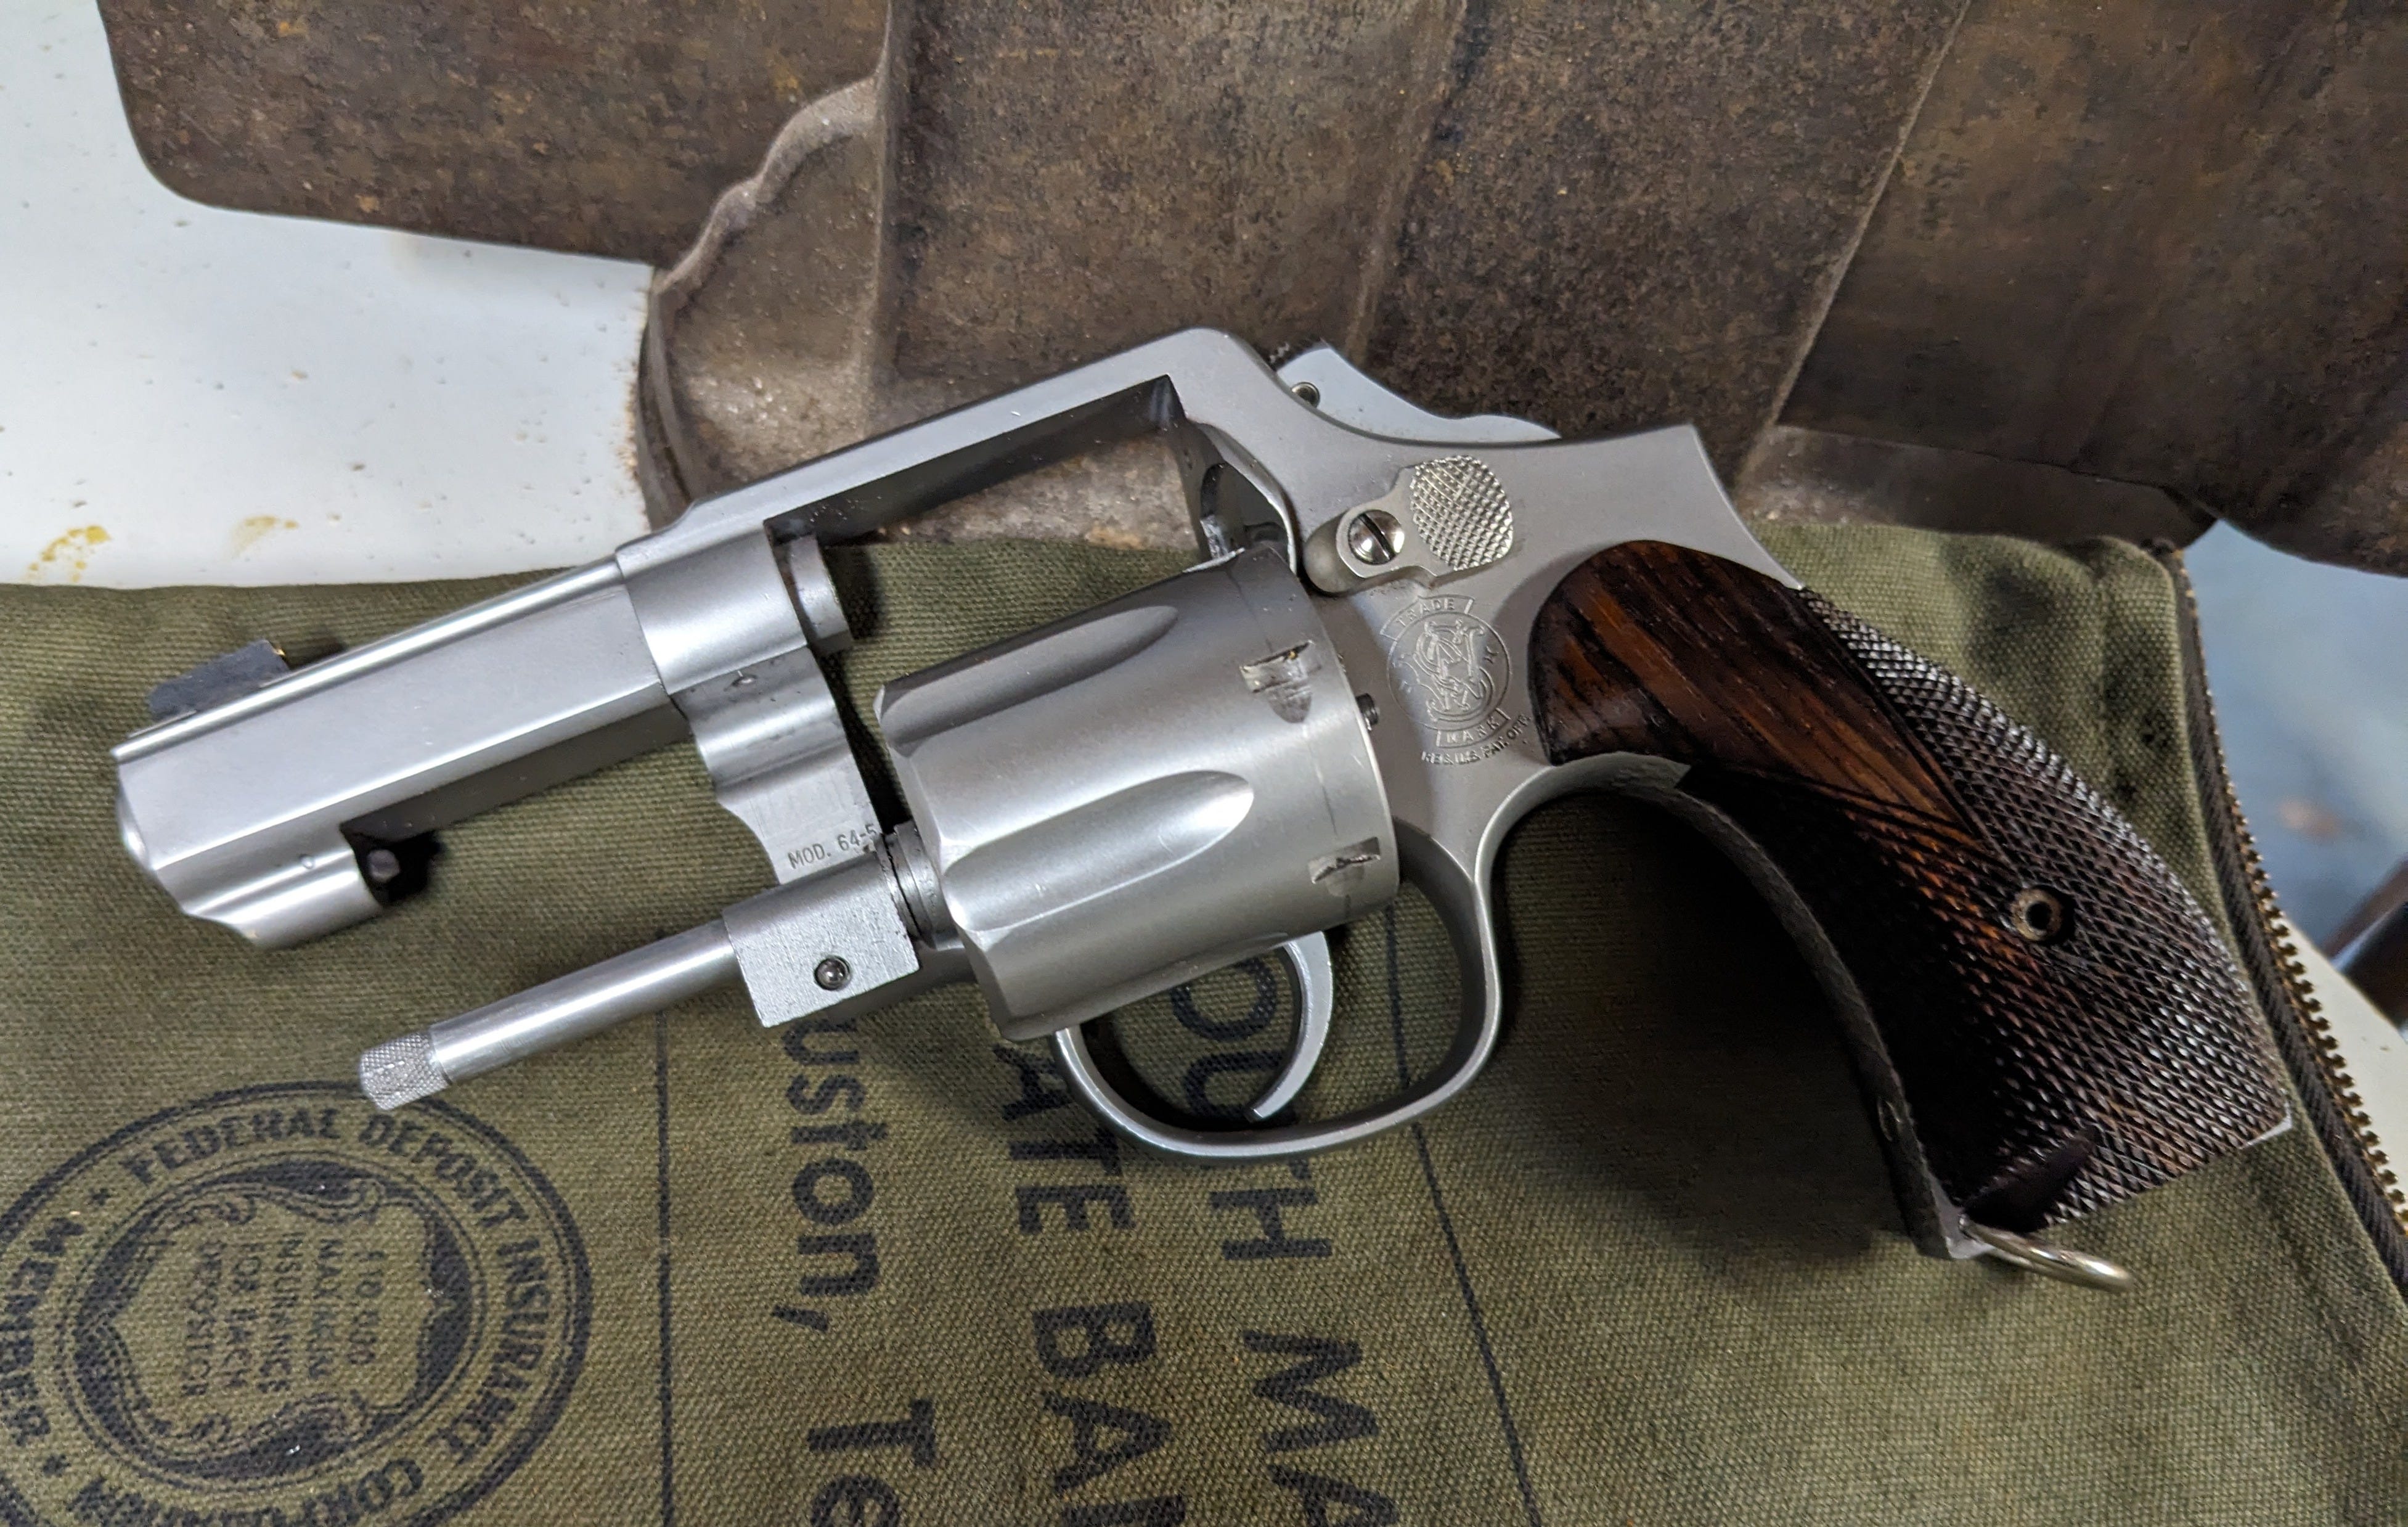
First, let’s get that barrel under control. My Model 64 came with a 4 inch barrel, which is a good length but can be made all the faster by shortening. Fitz would have advocated cutting it back to 2 inches, but Fitz worked primarily on early Colt models which did not have a front locking lug to deal with. Cutting this barrel to 2 inches would mean that I lose my front locking lug, plus in this day and age if I wanted a 2 inch barrel I would just buy one and fit it. Tiger felt the 3 inch barrel was the perfect combination of sight radius and the ability to draw the gun quickly. Maybe I drank the Kool-Aid myself, but gun writers have been discussing the merits of a 3 inch barrel for years, and in my experience, I have to agree with them. The 3 inch barrel just feels right, plus in the case of my revolver, it means that I could cut the barrel slightly in front of the locking lug. Having a 3 inch barrel also means that you have a long ejector rod, which has the added benefit of removing rounds quickly and more assuredly than the shorter ejector rods on a 2 inch gun. I removed the barrel from the Smith and parted off an inch. I then faced the barrel and made a decorative chamfer just to add some interest to the front of the gun; this makes the barrel look shrouded. I then added an 11 degree target crown. Functionally, the barrel was finished, but I didn’t like the look of the lettering being out of center. So I took a file and slabbed both sides of the barrel, which ended up both attractive and reduced the gun's weight even further.
After shaping the barrel, I chucked it up in the mill and cut a dovetail slot for a Novak-style front sight, like what comes on most 1911s. This gives me the benefit of having hundreds of sights on the market to choose from and some left and right adjustment for sighting. I chose a simple square blade which had to be filed down and reblued to regulate the sights. I then reinstalled the barrel and set the cylinder gap. Many gunsmiths use this opportunity to set a narrow cylinder gap, increasing velocity. I set a pretty healthy cylinder gap, especially on guns intended for defense. Suppose a problem with the functionality of your revolver is going to occur; in that case, it will involve the cylinder gap, whether it's a round that has jumped crimp or binding up from powder residue buildup. I would rather err on the side of functionality than save myself a hundred or so FPS.
Now, on to the cylinder and the crane. I decided to add a crane detent for added lockup strength, effectively turning this revolver into a triple lock. I’m not sure this modification is necessary because millions of rounds have been shot competitively through Smith revolvers with just two lockup points, and they work fine. Still, I had the stuff to do it, and it’s an added level of security. As for the cylinder, I decided to use a black powder chamfer on the front edge. This eases holstering the gun and is an attractive addition. I also chamfered the charge holes slightly; this aids in reloading, both by hand and especially with a speed loader.
Now, we move on to the internal parts. This is where the magic happens on a custom revolver. There is not much to see or show off to your friends, but this is what makes a revolver a pleasure to shoot. I completed both a trigger and an action job on this revolver. Every internal part and internal portion of the frame is stoned smooth, and I like to go the extra step of polishing those surfaces with a polishing compound. These steps reduce the weight slightly on the trigger pull, but more so, they reduce the feel of the weight. When rough machine parts cause no more little hitches and hangups, the action feels smooth and light even though no springs have been lightened. Adding a spring kit is an easy way for the home gunsmith to lighten the trigger pull on their revolver. The problem is that putting in a spring kit without smoothing the action will often lead to light primer strikes and weak trigger resets. A trigger and action job is the best option in a combat revolver. Nothing is as light as it could be, but you know the gun will go bang when needed. Also you may be tempted to back out the hammer spring strain screw to lighten up the double action trigger pull on a full size revolver. Technically, this works, but it also changes the working angle of the spring, which will eventually reduce its life span and undoubtedly break at the most inopportune moment. There is something any home gunsmith can do to lighten both the single and double action trigger on their revolver without compromising its ability to fire ammo, and that is to reduce the trigger return spring. In the past, people were taught to clip off a quarter of a coil on their return spring at a time until it was the weight they wanted, but this reduces the working distance of the spring and will eventually cause problems. The way to reduce the power on any coil spring is to put it on a thin rod that will allow it to spin. Then, a large belt sander is used to reduce the outer diameter of the spring. Go slowly and try it many times because you can’t put the metal back on if you go too far. This technique can also be used on any hammer spring that happens to be a coil spring, but remember, this will affect the gun's ability to strike primers.
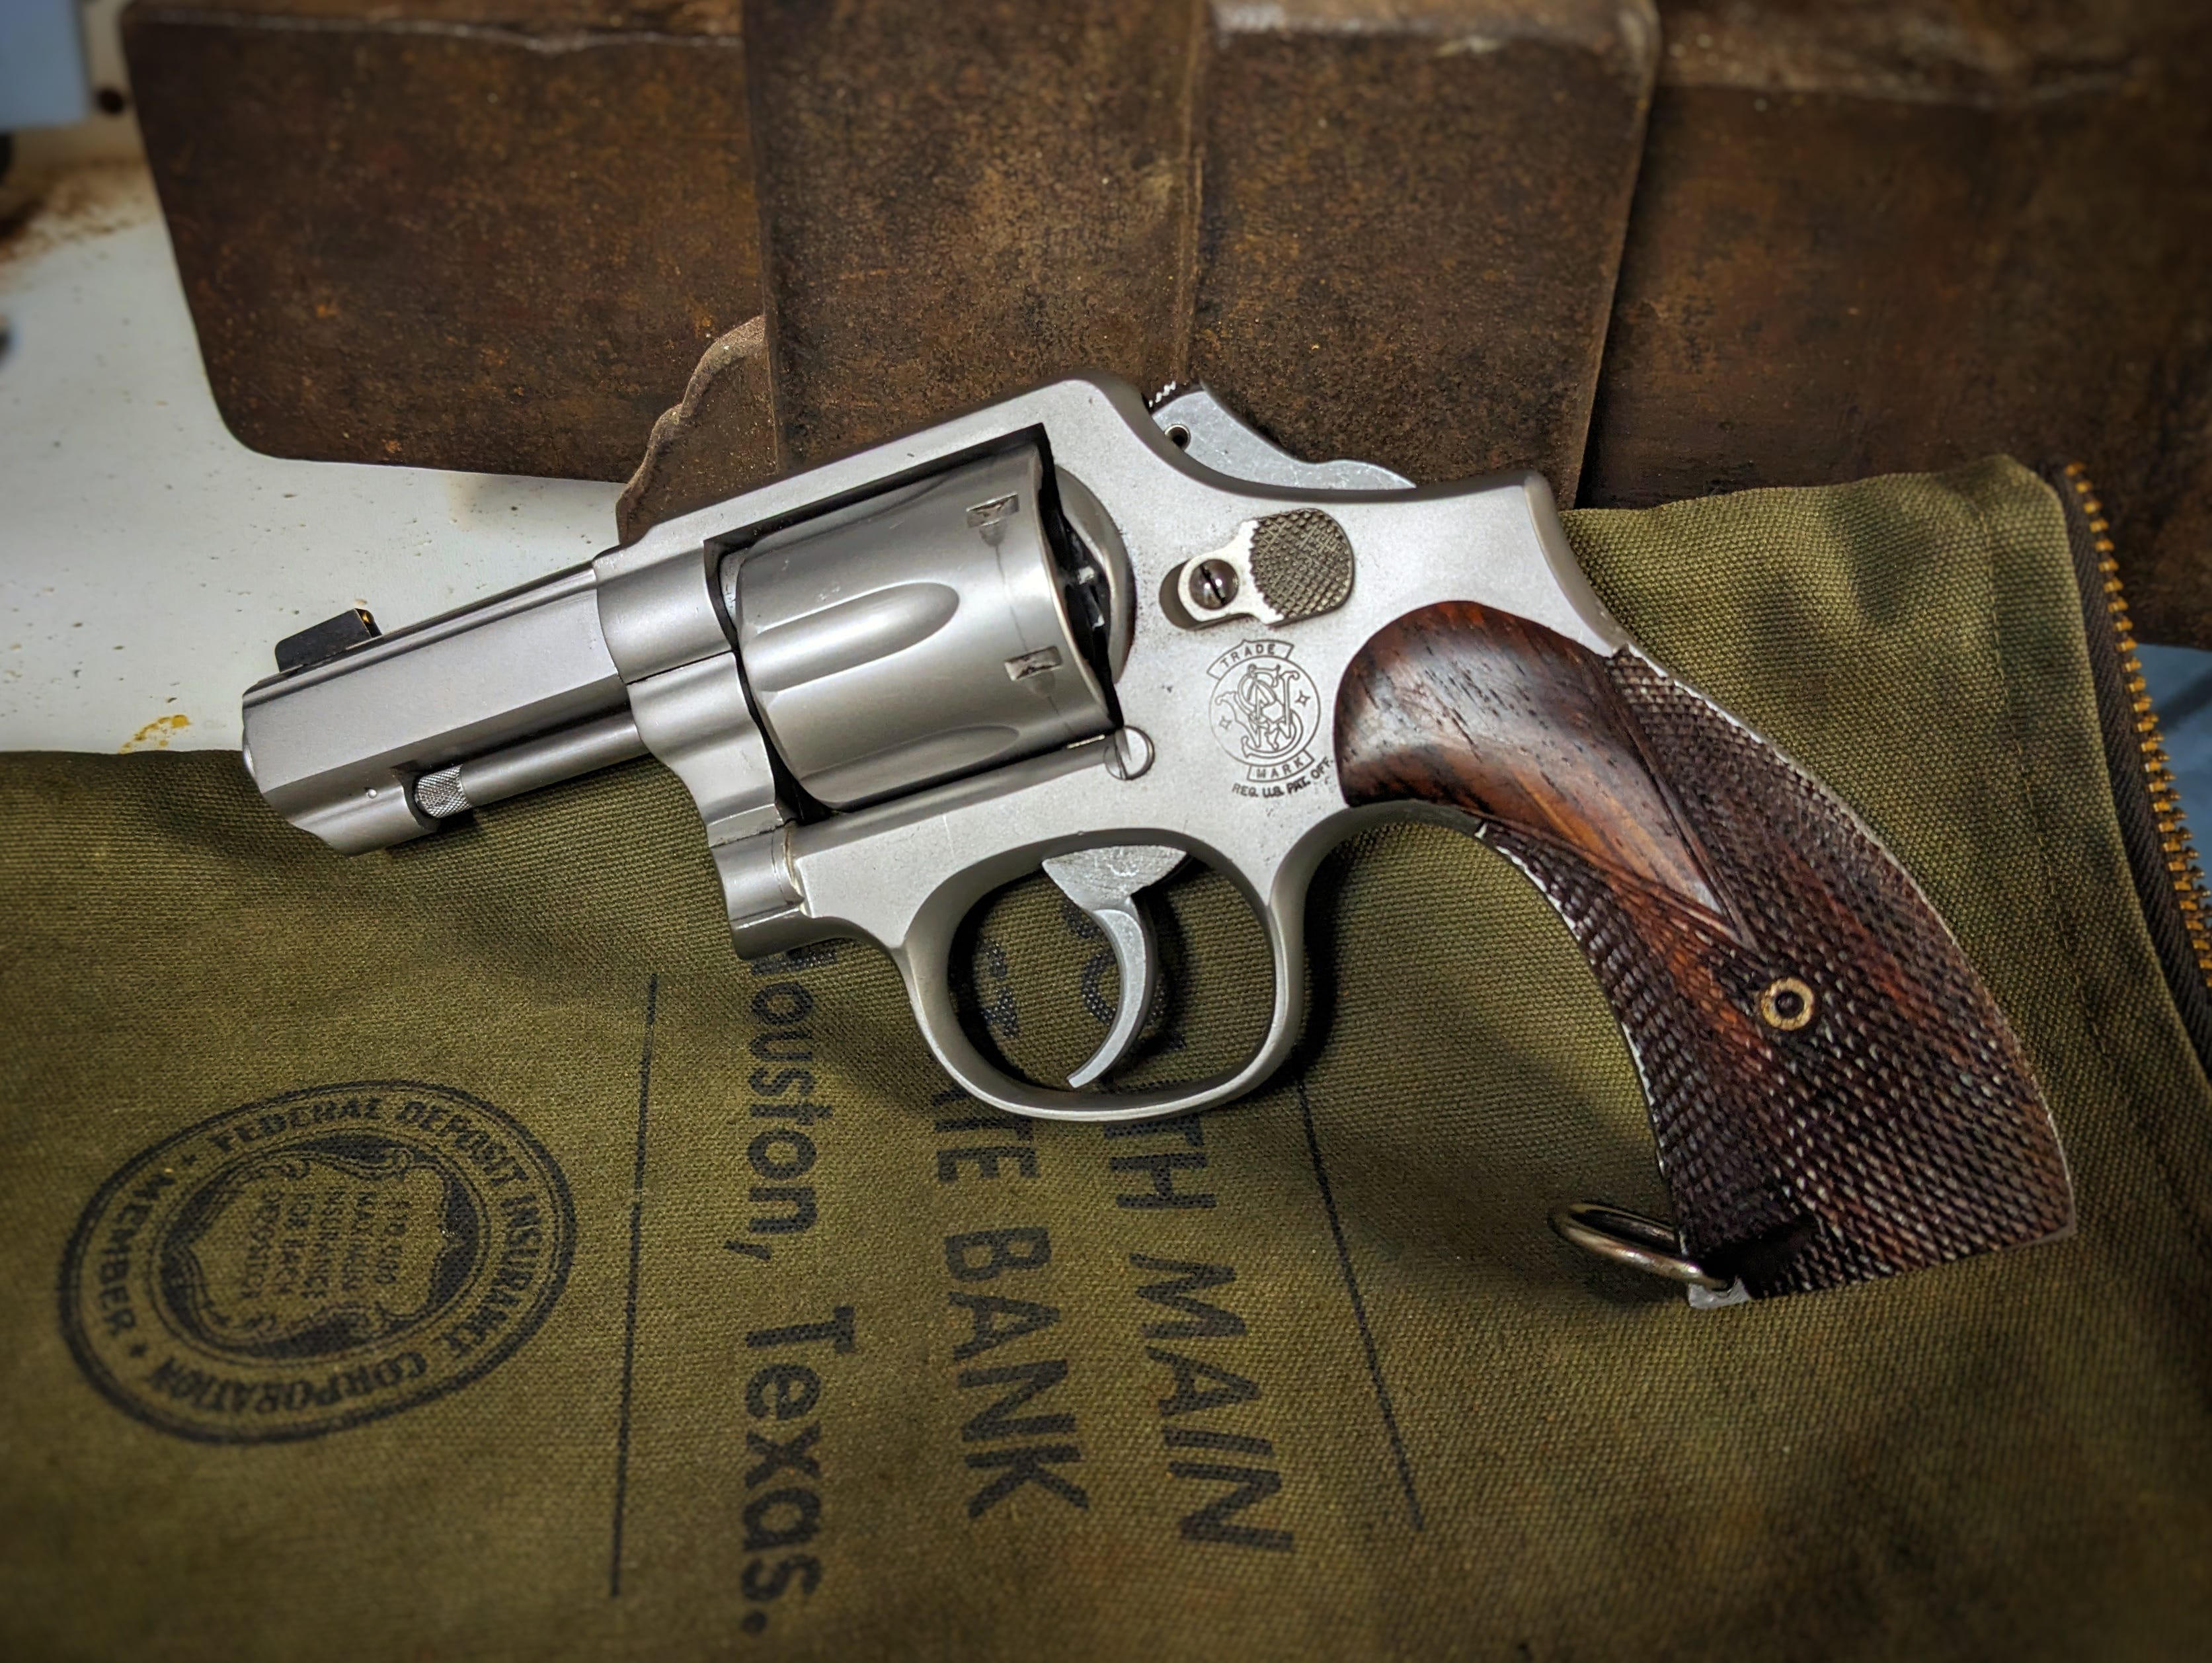
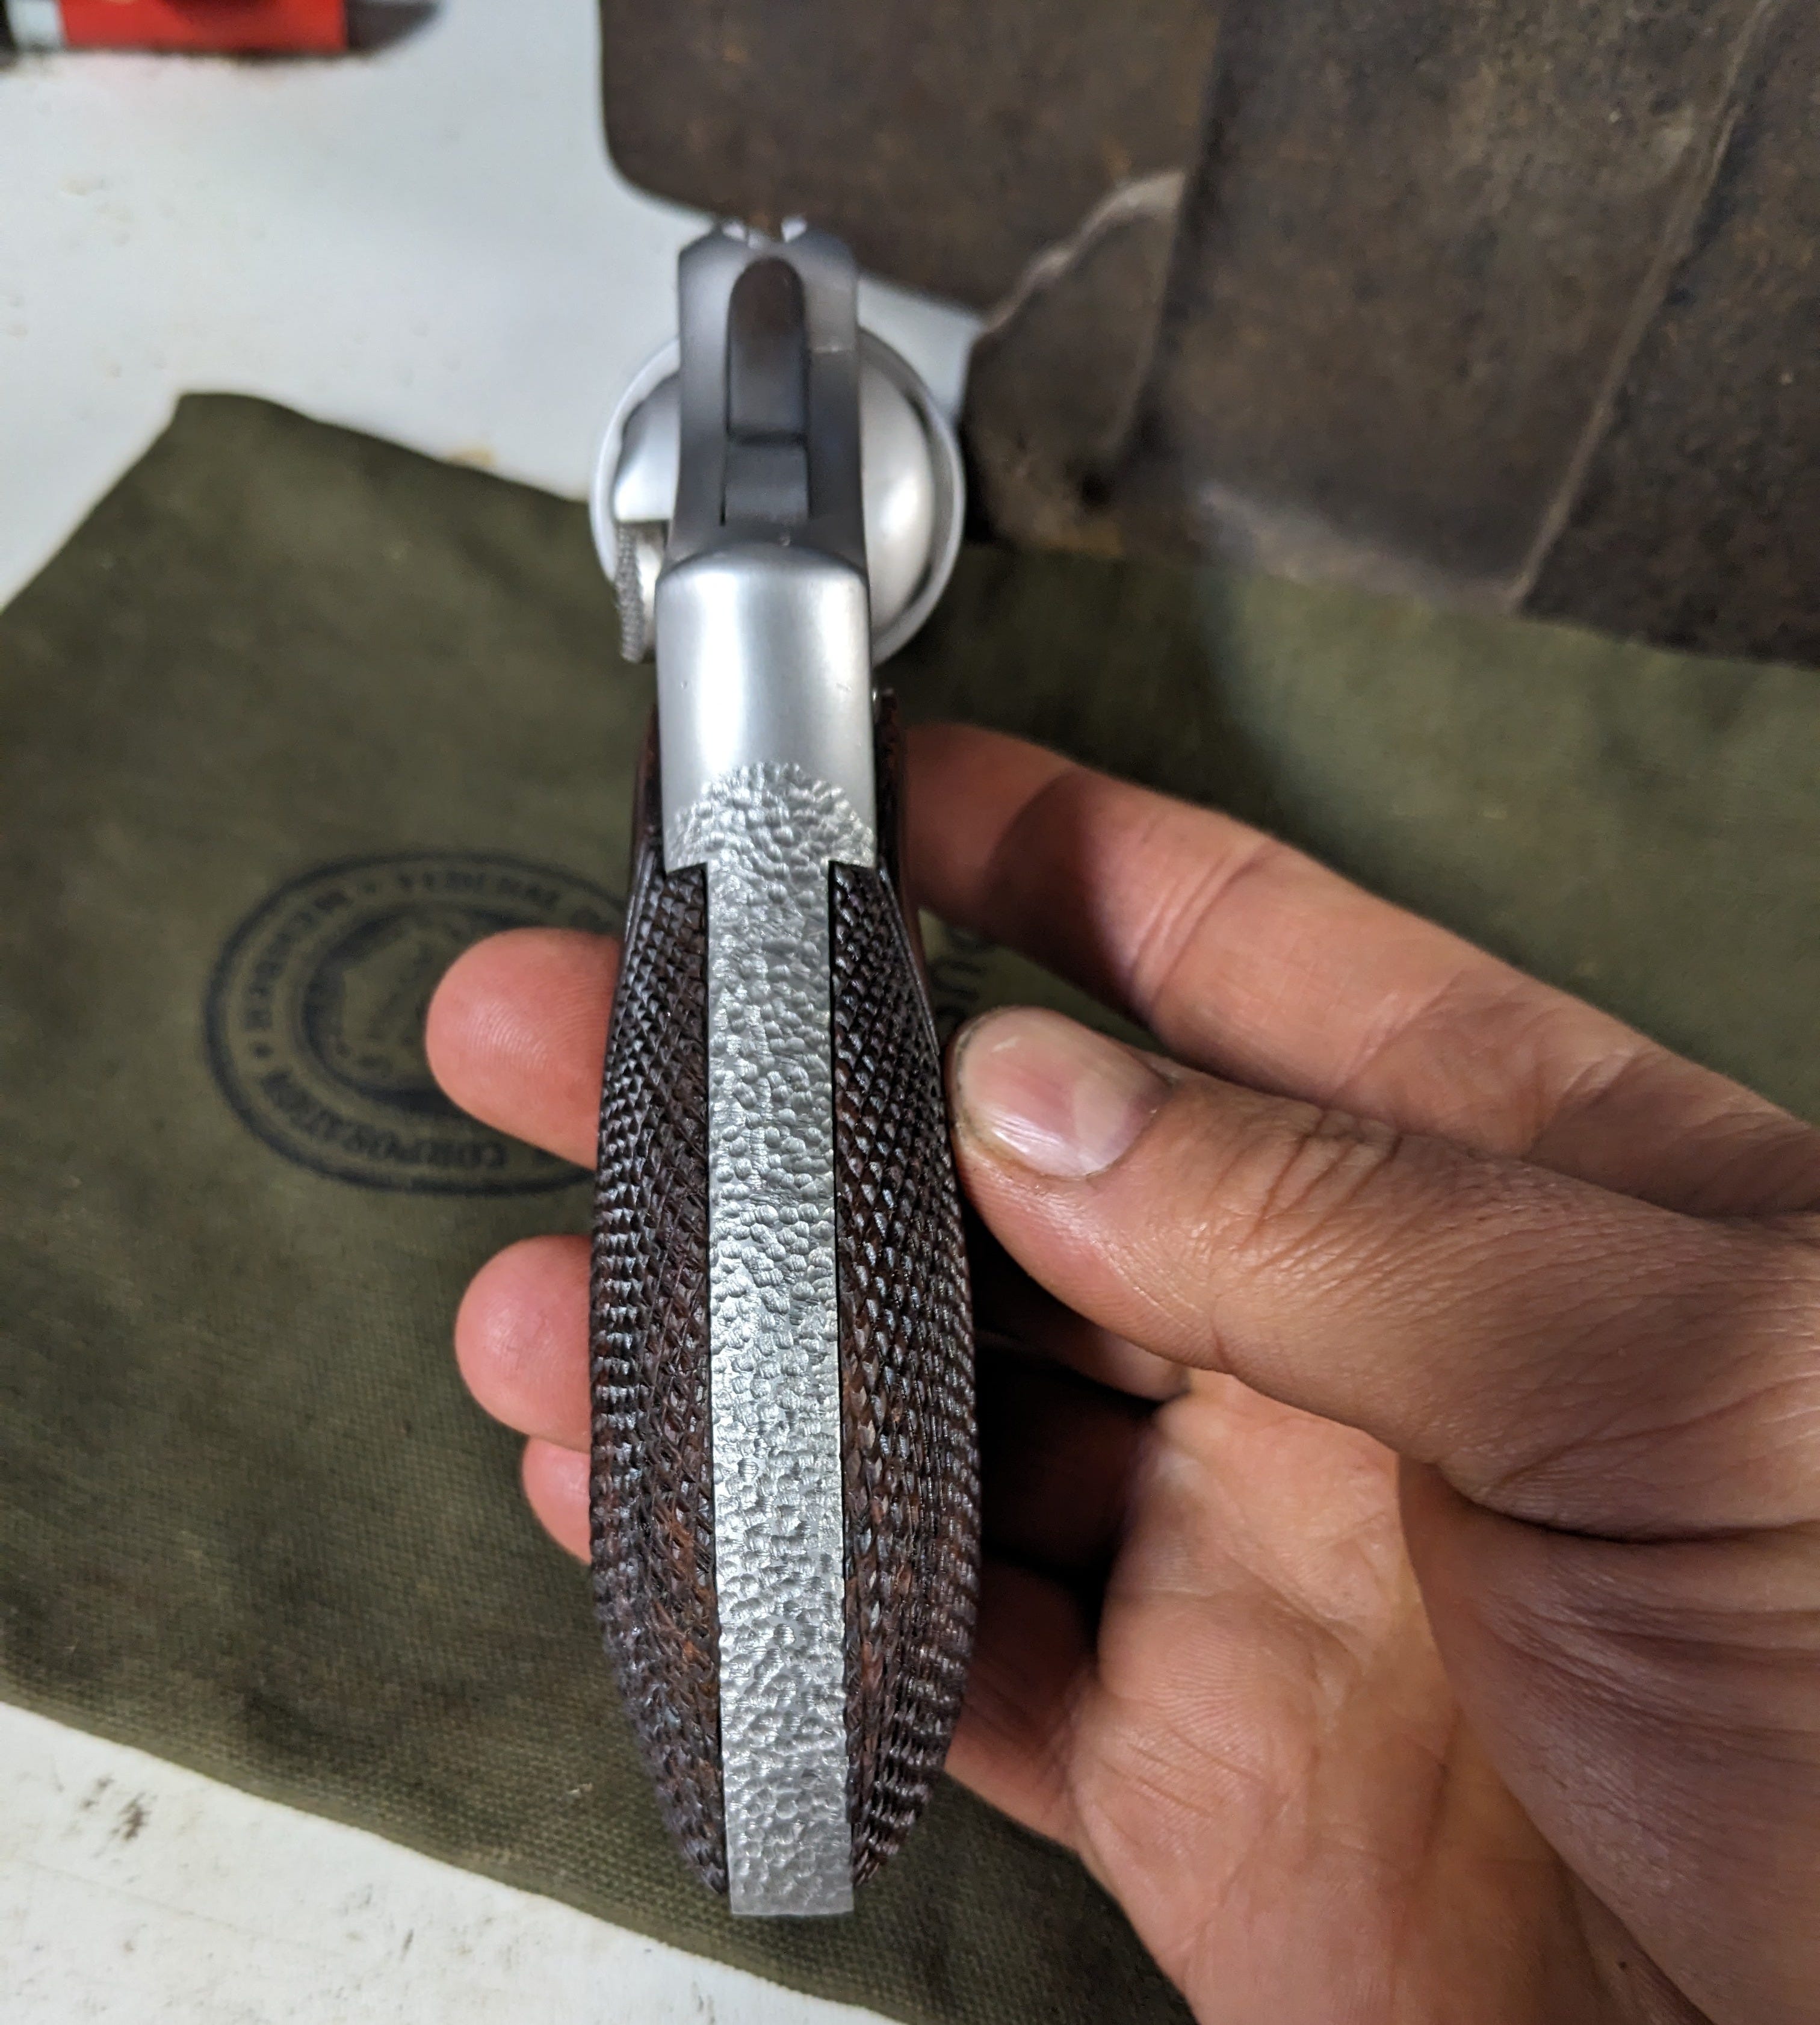
Now, we move on to the frame of the gun. This gun was originally a square butt and a standard conversion is to make it a round butt, which is much better for both concealment and shootability. I wanted to do something special, though, so I decided to make it a half-round. I removed the rear horn of the square butt, but not the front horn, this gives a comfortable grip in the rear but the front horn still causes the pinky to stick out when gripping, which I like. This is my favorite grip combination and one I often go with on my custom single action revolvers. Sometimes, it is referred to as a gunfighter grip. Unfortunately, this configuration means you are not getting any factory-made stocks, so I made my own. Rooting through my parts box, I found a set of homemade target-style stocks. I remember taking them off of a K frame snubbie, of all things. They were hideous, but there was enough meat there to do something with. Some significant modification with the ol’ belt sander and hand files, and I had something that would work for my purposes. There was a chip in the wood toward the front of the grip. To work around this issue, I filed a scallop into both stock halves, exposing the frame's forward portion. So, I decided to add a lanyard ring to that portion of the frame. Lanyard rings are a bit outdated today, but I have always liked their look, and this happy accident added an extra touch to a unique revolver. I have no idea what the original wood is, but it is beautiful, and I remember the sawdust produced made me so sick, so remember your respirators even if it’s a small job. Since I was trying to go classy, I decided some hand-cut checkering would finish the stocks off nicely. I also stippled the front and back strap on the grip frame for both looks and a little added purchase on the gun during recoil.
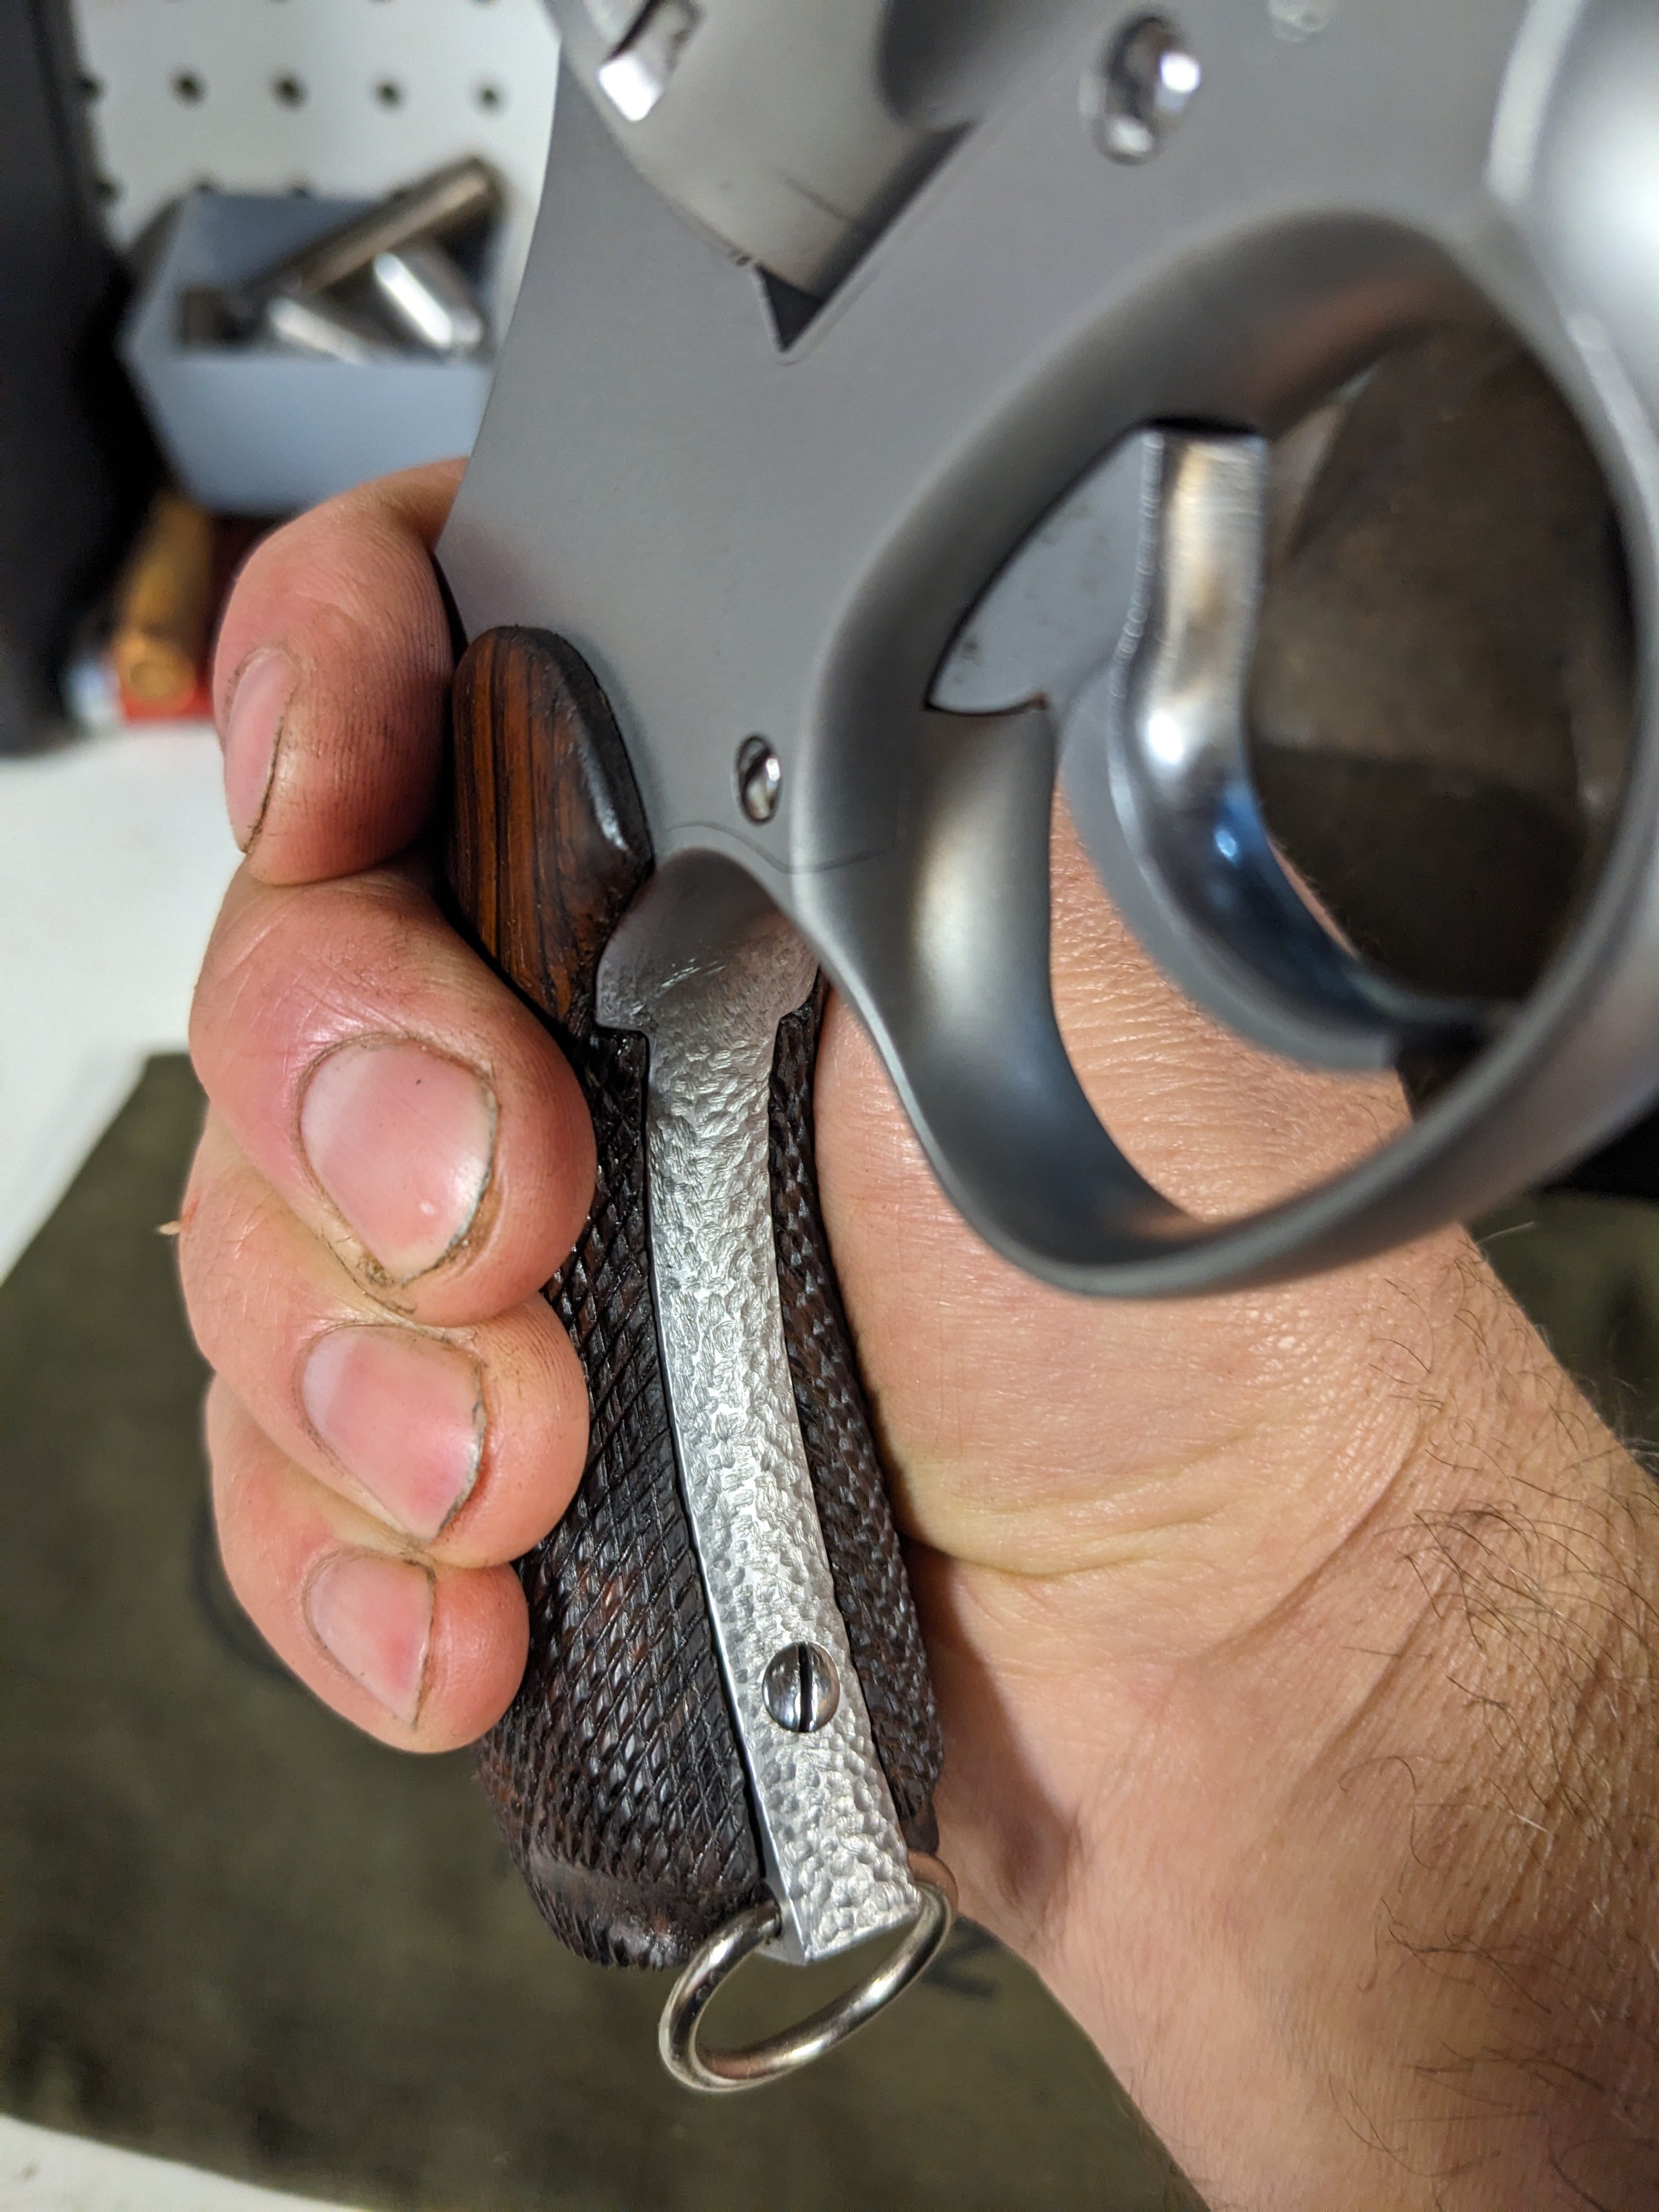
Other than the stippling on the grip frame, the only other modification I made to the revolver was scalloping the trigger guard. Fitz was famous for cutting half the trigger guard away on his revolvers, and Tiger trimmed them down considerably. I wasn’t quite ready to remove the whole trigger guard. Still, the scalloping did clean up the transition for my trigger finger from the frame of the gun in the ready position to the trigger, without compromising the guard as a safety feature.
Now that the gun was functionally complete and put together, I bead-blasted it for a nice matte finish.
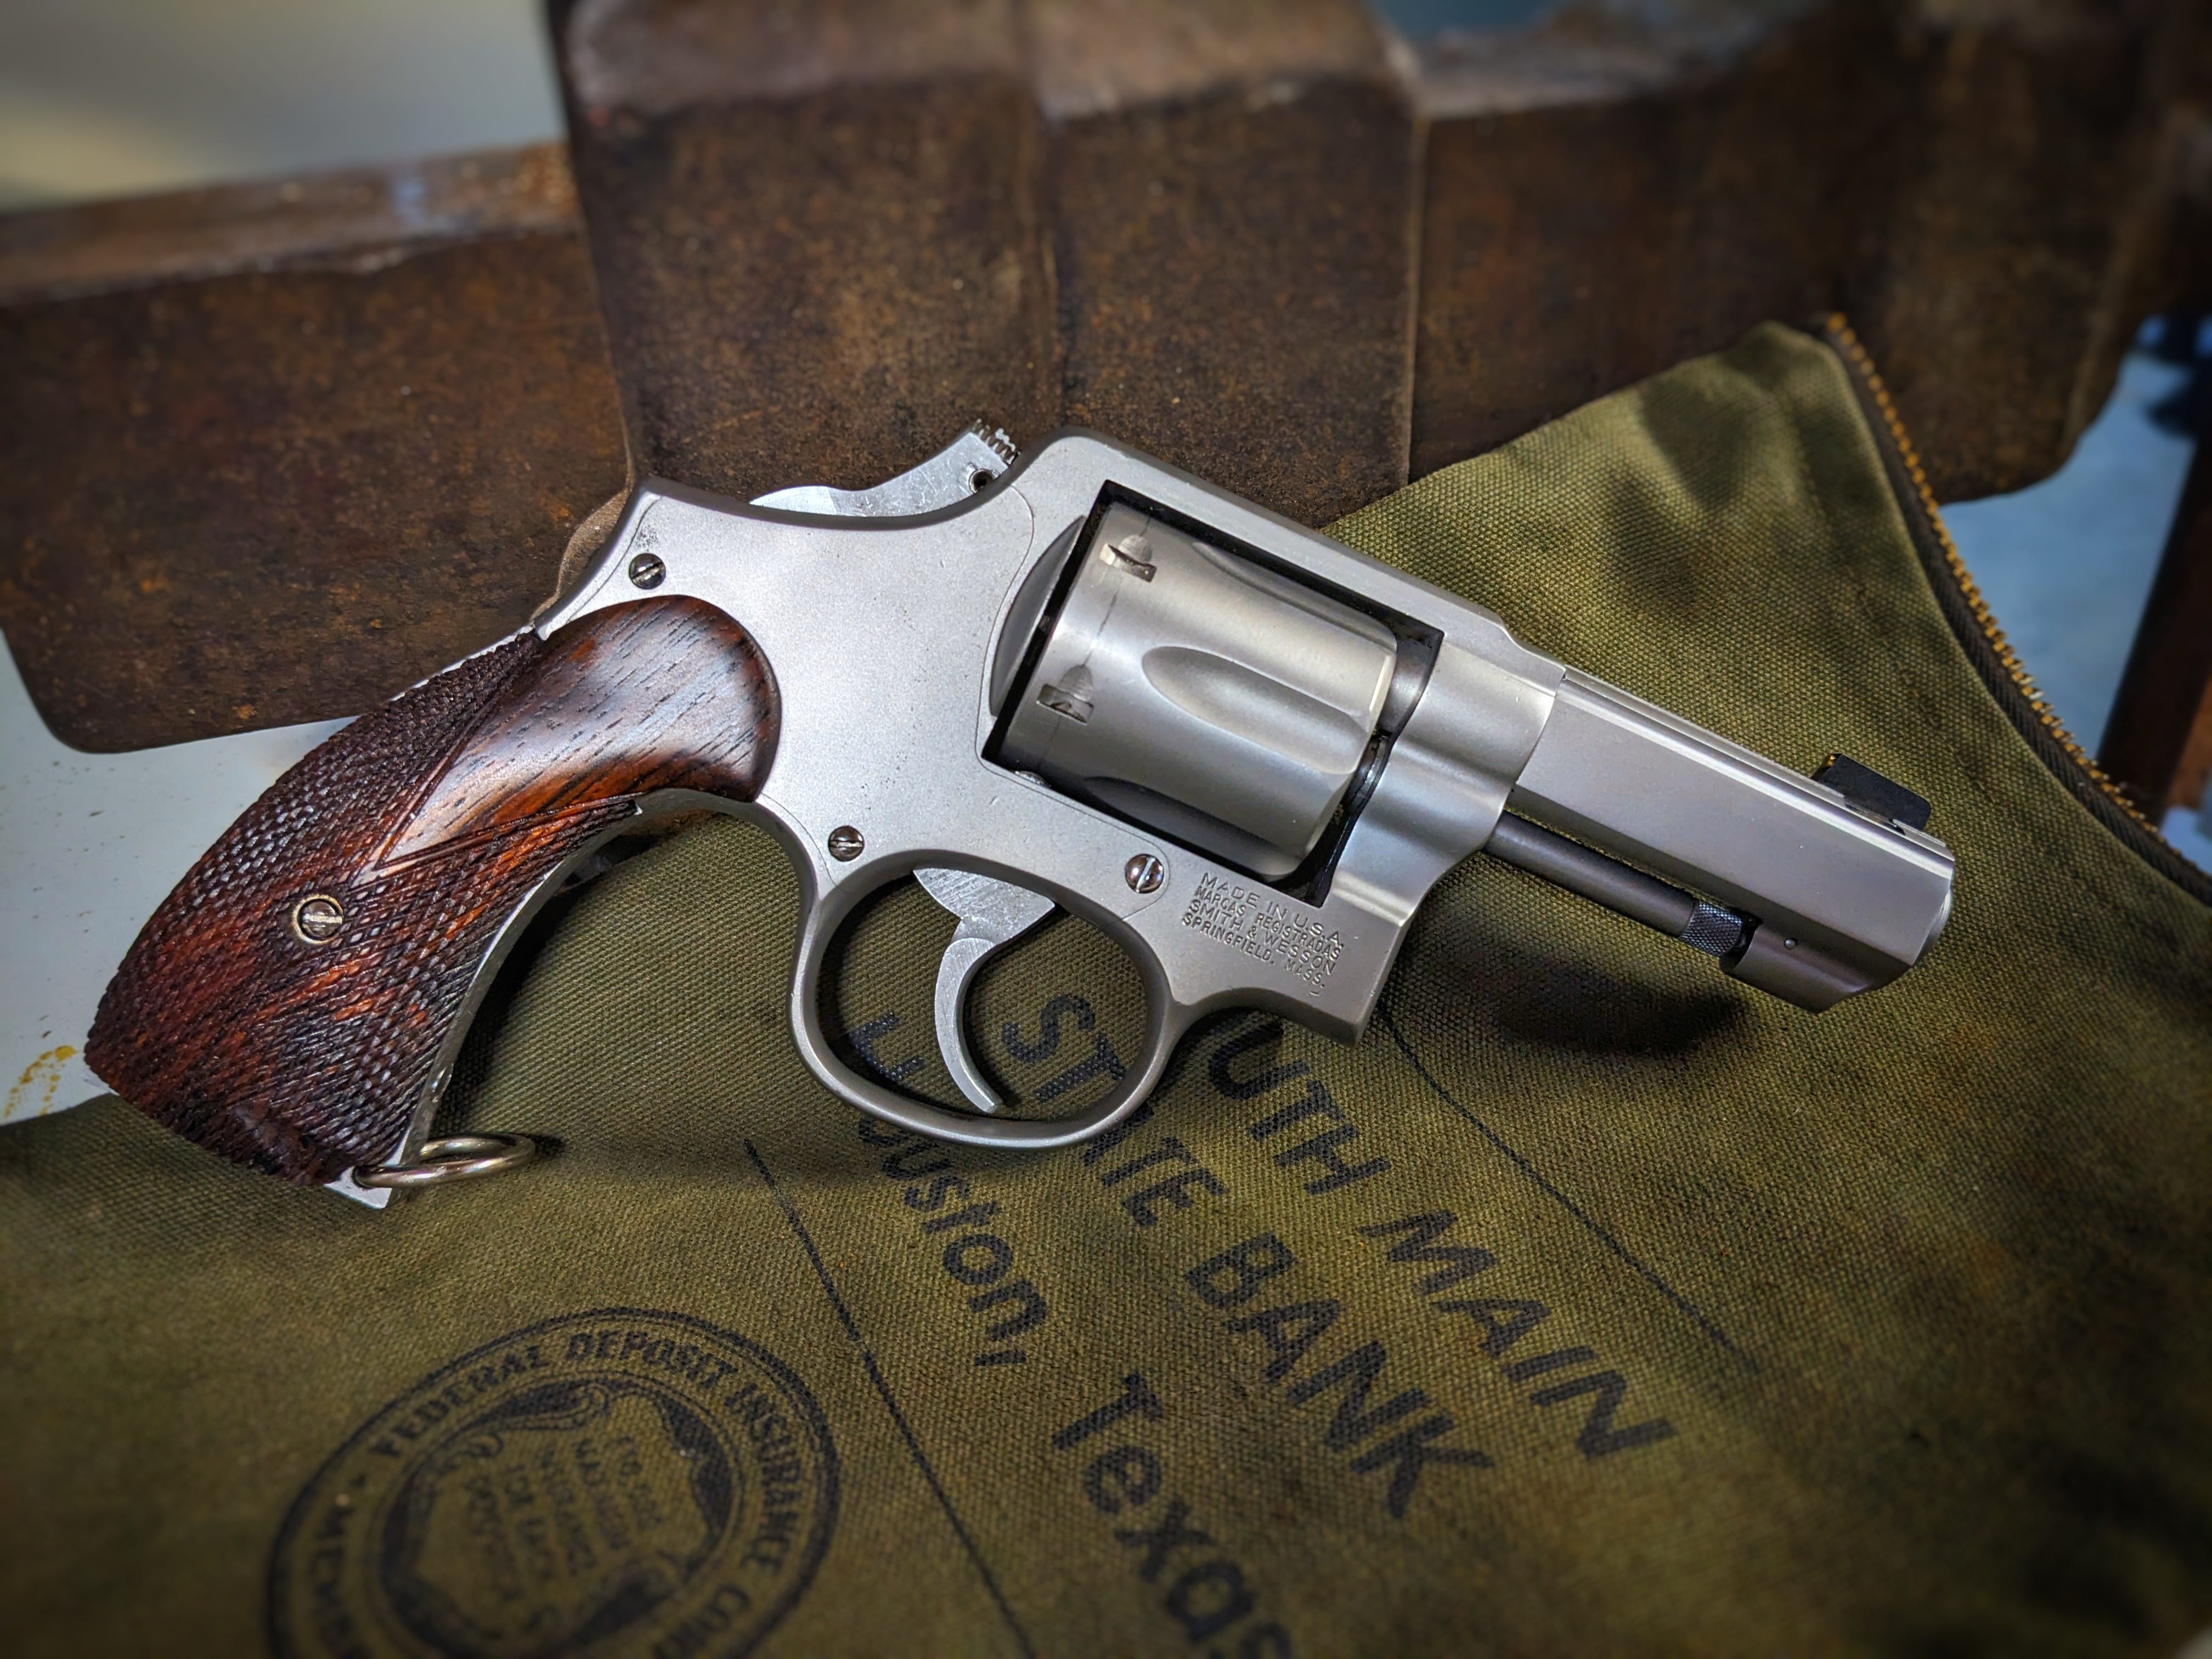
Shootin'.
I have yet to try many handloads in this revolver. Initial tests showed that its accuracy is well within the acceptable limits of a combat gun. I love the way this revolver balances and points. While the slab side barrels were initially just a way to remove unsightly and uncentered lettering, this gun's weight reduction is quite noticeable. It makes the gun feel like it has the traditional tapered Smith barrel rather than the bull barrel. I also love the half-round grip. Whenever I get a new handgun, I close my eyes and point it, then open my eyes to see how naturally it points for me. While I prefer the feel of a round butt to a square butt, often a round butt naturally points high for me. This grip combines the best of both worlds; the round rear improves the feel considerably, and the square front keeps the pointability of the original square grip. With full-power 158 grain ammo, this gun is not easy on the hands and would make for a long and painful day if I spent it training with this thing. I suspect adding a Tyler T grip would improve the recoil mitigation. Still, I have yet to try one on this gun, and in the worst-case scenario, I remove the lanyard ring and add rubber Pachmyer-style stocks, which would solve the problem for high round-count range days.
Chances are I won’t carry this gun often—I’m more of a J frame in the pocket kind of guy—but it was a joy to build, and I couldn't be happier with how it came out in both the looks and functionality department. I’m not sure if we will ever get to the point in America when people can walk around with bespoke handguns hanging off their hips without drawing stares from the pearl-clutching public, but if that day ever comes, I’ll be ready.
Couldn't agree more. 3 inches just seems to balance well
One of my "guns that got away" was a 3" round butt Model 13. I've CCW'd a 4" sb Model 10 quite a bit, but never without thinking of that 13. For a covert K on a belt, that's just about perfection. 👌